
New York, NY (June 25, 2025)—Synthesizer V Studio 2 Pro isn’t a synth in the traditional sense. It’s a vocal synthesizer that uses MIDI sequence data to trigger AI-controlled voices created from recordings of real singers, with modes for singing and rapping.
A purchase includes a standalone application and plug-in version. Either functions as a MIDI host, and the sequences you create or import drive the AI-controlled vocals. A sequence can have multiple tracks and be edited using a Piano Roll editor with multiple editable and automatable parameters.
The advantage of using the plug-in is that you can sync it to a DAW. The limitation is that your DAW controls the transport of the plug-in, but not vice versa—unless you’re an FL Studio, Studio One 5, Cubase 12, Reaper 6, Cakewalk or Ability5 Pro user.
Like a DAW, Synthesizer V features an Arrangement Panel that houses tracks and lets you cut up and rearrange them. In version 2, Dreamtonics has made splitting full tracks into independently editable groups easier.
For note-by-note editing, or working with selections of notes or groups, there’s a Piano Roll editor, where you can select, cut and paste notes or groups of notes, change their pitch and duration, edit the pitch curves, draw in new notes, and so forth. It’s also where you enter and edit lyrics.
NOTES GOING IN
Synthesizer V offers several ways to create or import a vocal part. One is to record into its sequencer directly from a MIDI controller. Another is the ability to import audio tracks into the timeline—an invaluable feature. Manual note entry is available by clicking-and- dragging in the Piano Roll or with a dedicated drawing tool. Another option is to import standard MIDI files.
Yet another way to go is to import an audio track of a vocal and then use the Extract Notes from Audio command. Synthesizer V converts the notes to MIDI in seconds, transcribes the words and automatically places everything on a track in the Piano Roll.
SPL Machine Head — A Mix Real-World Review
This feature worked flawlessly most of the time, although inevitably there were some corrections to make after the fact. The cleaner the performance on the audio track, in terms of pitch and pronunciation, the more accurate the conversion and transcription. If you’re importing a vocal track, you might want to pitch-correct it in your DAW first. Whichever entry method you use, notes appear in the Piano Roll with “la” as the default lyric (changeable in Settings). To enter lyrics, click on a note and type in the word.
Alternatively, the Insert Lyrics feature facilitates bulk entry. First, you select a group of notes and type lyrics for them into a dialog box. Then hit OK, and Synthesizer V inserts them in the sequence on the appropriate notes.
The AI Voices generally pronounce words correctly, but not always. When a word sounds wrong, phonetic spellings usually work. The introduction of Phoneme Timing in Version 2 lets you lengthen, shorten and change the level of the phonemes in the lyrics. For example, if you’re not getting enough of a consonant sound at the beginning of a word, you can emphasize it more.
THE VOICES
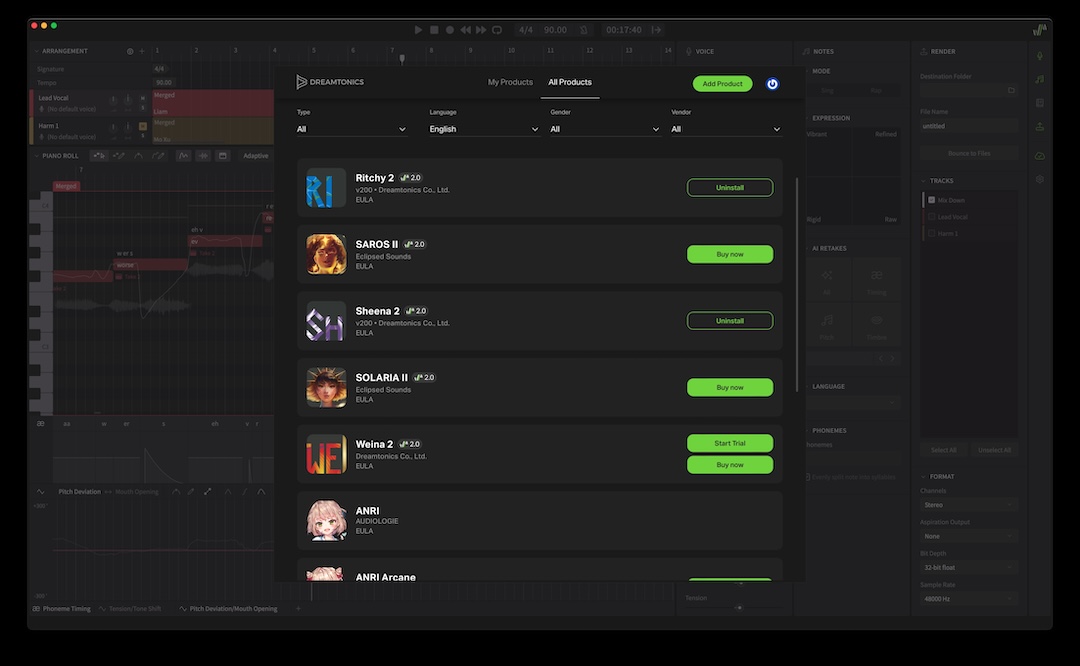
The most crucial aspect to assembling a vocal track is the quality of the singers. Fortunately, Dreamtonics has done an excellent job creating the various AI “Voices,” basing them on recordings of real singers. The dozen or so available Voices differ in gender, sound and style, and they can be customized using various adjustable parameters. A purchase comes with only one, however, and you’re going to want more; you can add others through the software’s Product Manager Panel, or on the Dreamtonics site. Users have full rights to any vocal parts they produce.
I often used the Voice named Liam (they all have first names) because it has a gruff sound suitable for rock and Americana, which fits my projects. For the review, I was given access to several others, both male and female. Most seemed suited for R&B, pop and EDM.
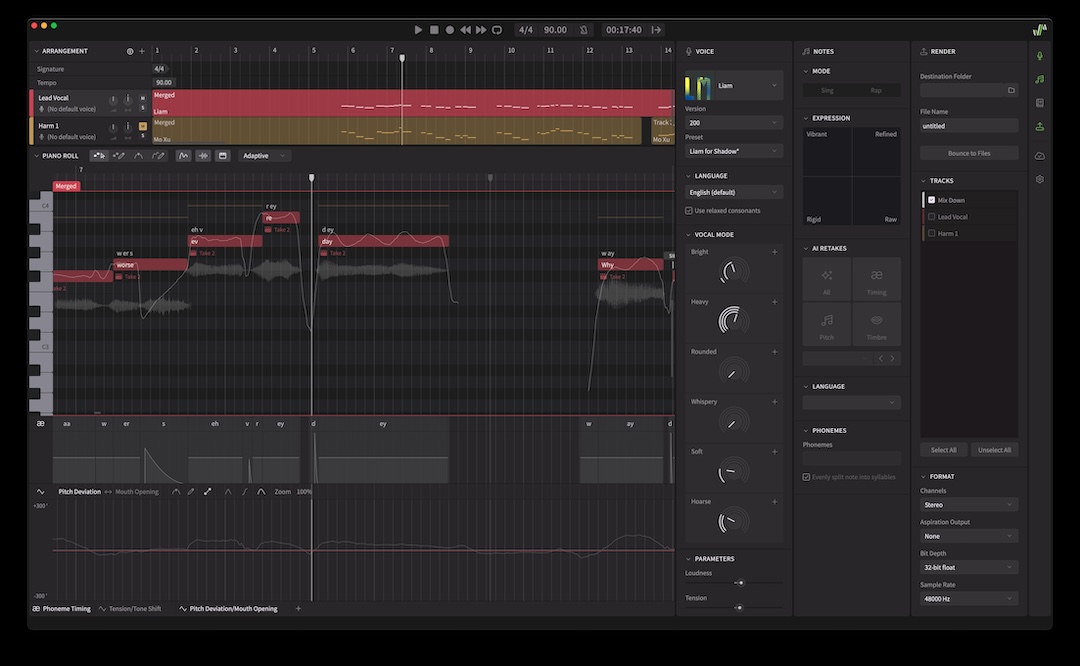
Once you’ve selected a singer in the Voice Panel—a vertical window on the right—you can make adjustments with the Vocal Mode parameter knobs. Each singer has a different selection of Vocal Mode adjustments.
For example, Liam has knobs for Bright, Heavy, Rounded, Whispery, Soft and Hoarse. Natalie 2, meanwhile, offers Bold, Soft, Soulful, Steady and Warm. Within each parameter, Version 2 has added the ability to open three subparameters for even finer control. You can save Vocal Mode settings as presets for each singer.
Below the Vocal Mode knobs are sliders for Loudness, Tension, Breathiness, Gender and Tone Shift, which are the same in every Voice. The Tension parameter is especially useful because it adds intensity to the performance. If you split a track into Groups, you can have different Vocal Mode settings for each—perhaps raising the Tension in the choruses only. The Gender parameter changes the timbre; I could only dial in a slight deviation in either direction before it started sounding unnatural.
The Parameter Panel, which sits below the Piano Roll, accesses fields for drawing in automation curves for any editable parameter, allowing for adjustments beyond what’s in the Voice Panel.

TAKE 2
What used to be called the Notes Properties Panel is now the Notes Mode Panel. This is where you access a feature called AI Retakes, whereby Synthesizer V creates minor variations of the notes based on Timing, Pitch, Timbre or all three, as if a singer had done multiple takes. You can create AI Retakes for full tracks, smaller selections, Track Groups or even single notes. Comping is extremely easy.
The new Expression Pad is similar to an XY pad but offers four additional performance-related properties—Vibrant, Refined, Rigid and Raw— that can be added, singly or in combination, for everything from individual note to full tracks.
The Notes Mode Panel is also where you can switch from Sing Mode to Rap Mode. The latter is tailored to spoken-word performances and emphasizes rhythmic aspects more than melodic. You can apply it to an entire track, selection or track group. You can even create hybrid sung/spoken tracks.
Once you’re ready to export your part or parts, the fully featured and easy-to-use Render section lets you specify which tracks to bounce. It even offers the option of splitting out the “Aspirations” (breaths and other voice noises) and rendering them onto a separate track, giving you more control over them in your DAW mix.
You can bounce tracks in mono or stereo, 16-bit, 24-bit or 32-bit float resolution with 44.1, 48 or 96kHz sampling rates. Dreamtonics says it has increased rendering speed by 300 percent in version 2.
FEEL THE POWER
I got up and running on the basics quickly with Synthesizer V Studio 2 Pro, but grasping the nuances of its features required significantly more time. It didn’t help that parts of the manual were confusing and/or outdated.
I was also a bit perplexed by the Piano Roll’s option in the snap-to-grid feature. The grid lines don’t match the snap values. For example, if you set the grid to 1/1, instead of one grid line per measure, you see four, and the snapping is quarter notes. If you set it to 1/2, it snaps to eighth-notes, etc. Dreamtonics says that it’s a tradition in vocal synth software to count in quarter-notes, not measures, and they’re considering a change for a future version. To me, it’s a no-brainer: Change it!
Discover more great stories—get a free Mix SmartBrief subscription!
I was also surprised to discover no global pitch correction feature. Because converted audio tracks often need pitch massaging, a correction algorithm with scale-conforming options would be helpful.
That aside, I’m highly impressed with the power and depth of the software. I used it to create vocals from scratch using MIDI input. I also had the software “re-sing” previously recorded vocal tracks, importing them through the Extract Notes from Audio feature. Some projects required lots of editing inside the Piano Roll, and others not as much. Either way, the results sounded like an actual singer recorded them.
Some may not like the idea of vocals created using AI, but Dreamtonics Synthesizer V Studio 2 Pro incorporates it into its workflow while keeping the creativity in the hands of the user. That’s the way it should be.